
Recently in CodeSession I encountered the following logged warning:
No XML encryptor configured. Key {6848a46f-d0d6-49a6-b035-0f30f5448f9d} may be persisted to storage in unencrypted form.
This was totally new to me, so I started Googling. There I learned all about .NET Core’s Data Protection API.
After reading the MS docs, this was still confusing. The documentation states that this API is used for things like .NET Authorization, but CodeSession doesn’t use that functionality. So why was this happening?
.NET Core MVC XSRF Request Validation
I eventually figured out that .NET Core MVC uses Data Protection under the hood if you’re employing Request Validation code to protect forms .
Code in my Views:
|
|
Code in my Controllers:
|
|
The reason for the logged warning that I got in the first place is that Data Protection must be configured to persist keys in a shared place when using 2+ instances of an app. From the MS docs:
The data protection stack must be configured to work in a server farm
When the Data Protection system is initialized, it applies default settings based on the operational environment. These settings are appropriate for apps running on a single machine. However, there are cases where a developer may want to change the default settings:
- The app is spread across multiple machines.
- For compliance reasons.
For these scenarios, the Data Protection system offers a rich configuration API.
All n instances of your app must all share the same cryptographic keys, in order to produce the same results.
What Happens If You Don’t Configure Data Protection
When left unconfigured, Data Protection generates and stores a local encryption key based on local machine and environment settings. This is a problem for an app with more than 1 instance behind a load balancer, because each instance of the app will generate its own unique key that is different. And if requests to your app randomly bounce between instances behind a load balancer, the key generated on machine 1 will not match the key generated on machine 2, and you’ll get all kinds of fun cryptography related exceptions + your users will get error pages.
I needed to solve this for CodeSession because run on more than 1 instance. I host in Azure, so once more I went to Google to figure out how to configure the Data Protection API for Azure. Unfortunately it turns out that the documentation is a little out of date, a bit unintuitive, and in some cases straight up wrong. So here’s how to configure Data Protection in Azure quickly and correctly.
Data Protection in Azure For <$0.05 A Month
1. Get The NuGet Packages
The first step is to install a few NuGet packages to enable configuration:
Azure.Extensions.AspNetCore.DataProtection.BlobsAzure.Extensions.AspNetCore.DataProtection.Keys
2. Configure Azure Resources
Next you need to do most of the work in Azure. We’ll need a Key Vault, a Storage Blob Container, and an Azure Managed Identity to get this done.
Key Vault
Create an Azure Key Vault using the cheapest settings possible (or re-use one you already have). You won’t need the Certificate functionality that is offered, just the ability to store Keys.
Important note: your app will need to be able to access your Key Vault, so if you haven’t set up Virtual Networks, you’ll need to enable public access. Go to Settings > Networking and set “Allow public access from all networks” to enable. It sounds scary, but it just exposes an endpoint to the Internet - people still need authenticated accounts to access anything at all. Still, I’d recommend setting up a Virtual Network as the most secure option.
Once that’s provisioned, go to Objects > Keys and click the Generate/Import button. Give it a name that you’ll remember (I called mine “dataprotection”) and all the other defaults are totally fine:
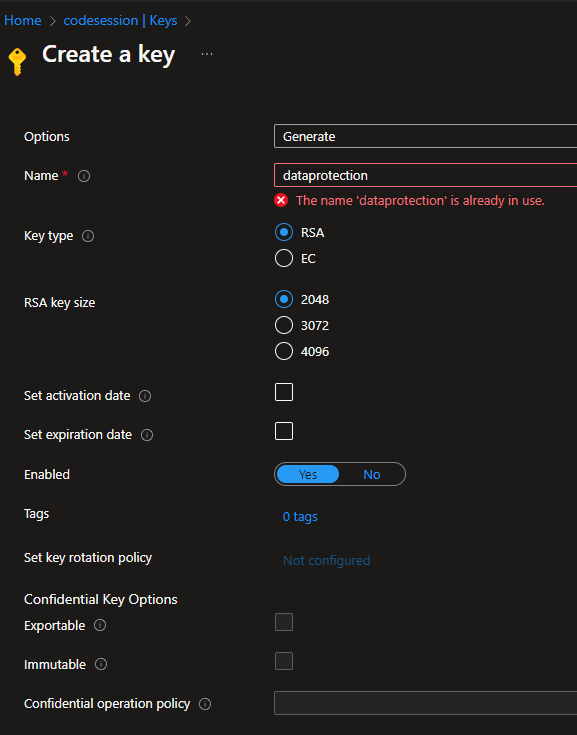
Data Protection Vault Key
Press Create. All done with this step.
Storage Container
Create an Azure Storage Account using the cheapest settings available (or re-use one you already have).
Important note: your app will need to be able to access your Storage Account Container, so if you haven’t set up Virtual Networks, you’ll need to enable public access. Go to Security + Networking > Networking and set Public network access to “Enabled from all networks” to enable. It sounds scary, but it just exposes an endpoint to the Internet - people still need authenticated accounts to access anything at all. Still, I’d recommend setting up a Virtual Network as the most secure option.
Next go to Data Storage > Containers and create a new container where you’ll store your encrypted keys. I called mine “dataprotection” here also:
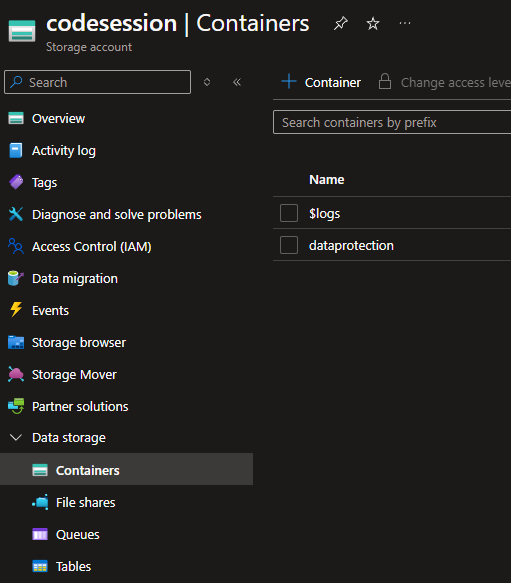
Data Protection Storage Container
Once created, you’re all done here.
Azure RBAC Managed Identity
This is perhaps the trickiest part. Finally you need to set up a Managed Identity that can access these new resources from your application.
From Azure, go to Managed Identities. Create a new identity with a useful name - I called mine “dataprotection-access”.
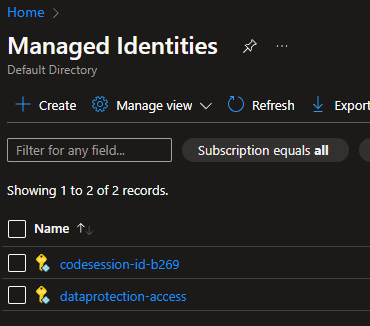
Data Protection Managed Identities
Once provisioned, we’ll need to give this identity specific roles. Go to Azure role assignments within the identity and give it:
- Key Vault Crypto User role on your Key Vault
- Storage Blob Data Contributor role on your Storage Container.
These are the least privileged roles needed to make Data Protection work. Once configured your role assignments will look like this:
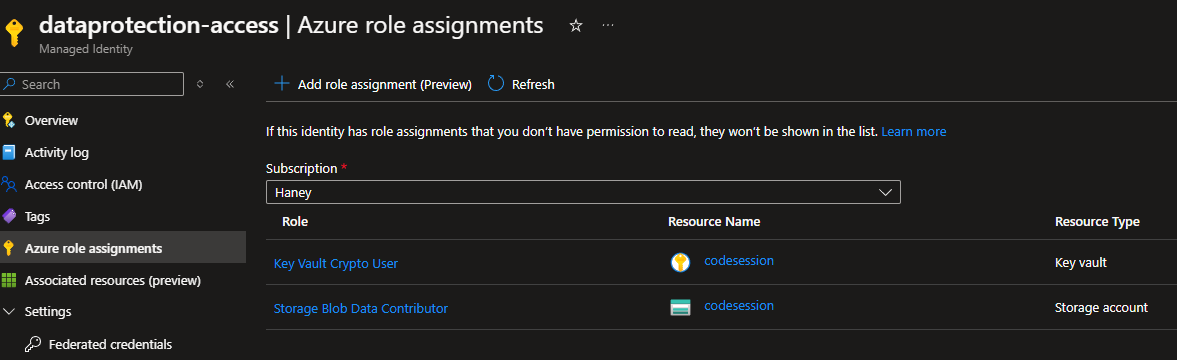
Data Protection Managed Identity Roles
Just one last thing to do in Azure. Your app needs to be able to assume this new Managed Identity, thus gaining the access it provides.
Go to your app (mine is a Web App), then go to Settings > Identity. Here, click the User assigned tab at the top, click add, then select your new Managed Identity. When configured it’ll look like this:
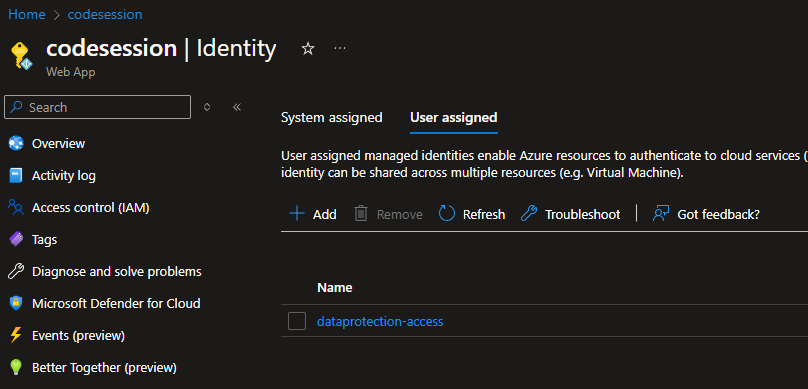
Data Protection App User Assigned Identity
OK! You made it! We’re done with all the Azure stuff, so finally it’s time to write a few lines of code.
3. Configure Your .NET Core App
This is the easy part. In your Program.cs file, add the following code:
|
|
Note that we pointed to a keys.xml blob file in the container that doesn’t yet exist. Don’t worry - the API will create it for you automatically.
Next, run your app. If you followed all these steps correctly, everything should now work properly! You can also look for and inspect the newly created keys.xml file in your container within Azure Portal to verify.
A final note: I recommend putting this configuration logic behind an if (localDev) check / branch once you’ve verified that it’s working. You don’t need to run all this or talk to Azure for local dev purposes. It just needs to work when deployed.
Hopefully this helps other people sort out the Data Protection configuration - it ate up a good 3 or 4 hours of my time last week. Cheers!